
Cavitation Failure Analysis
Cavitation Failure Analysis
Common Symptoms
Maintenance teams may notice these signs when cavitation develops in a vacuum pump:
- A crackling, popping, or gravel-like noise during operation
- Increased vibration or unusual movement at the pump or motor
- Fluctuating vacuum levels, reduced capacity, or unstable operating performance
- Higher motor load, power consumption, or operating temperature
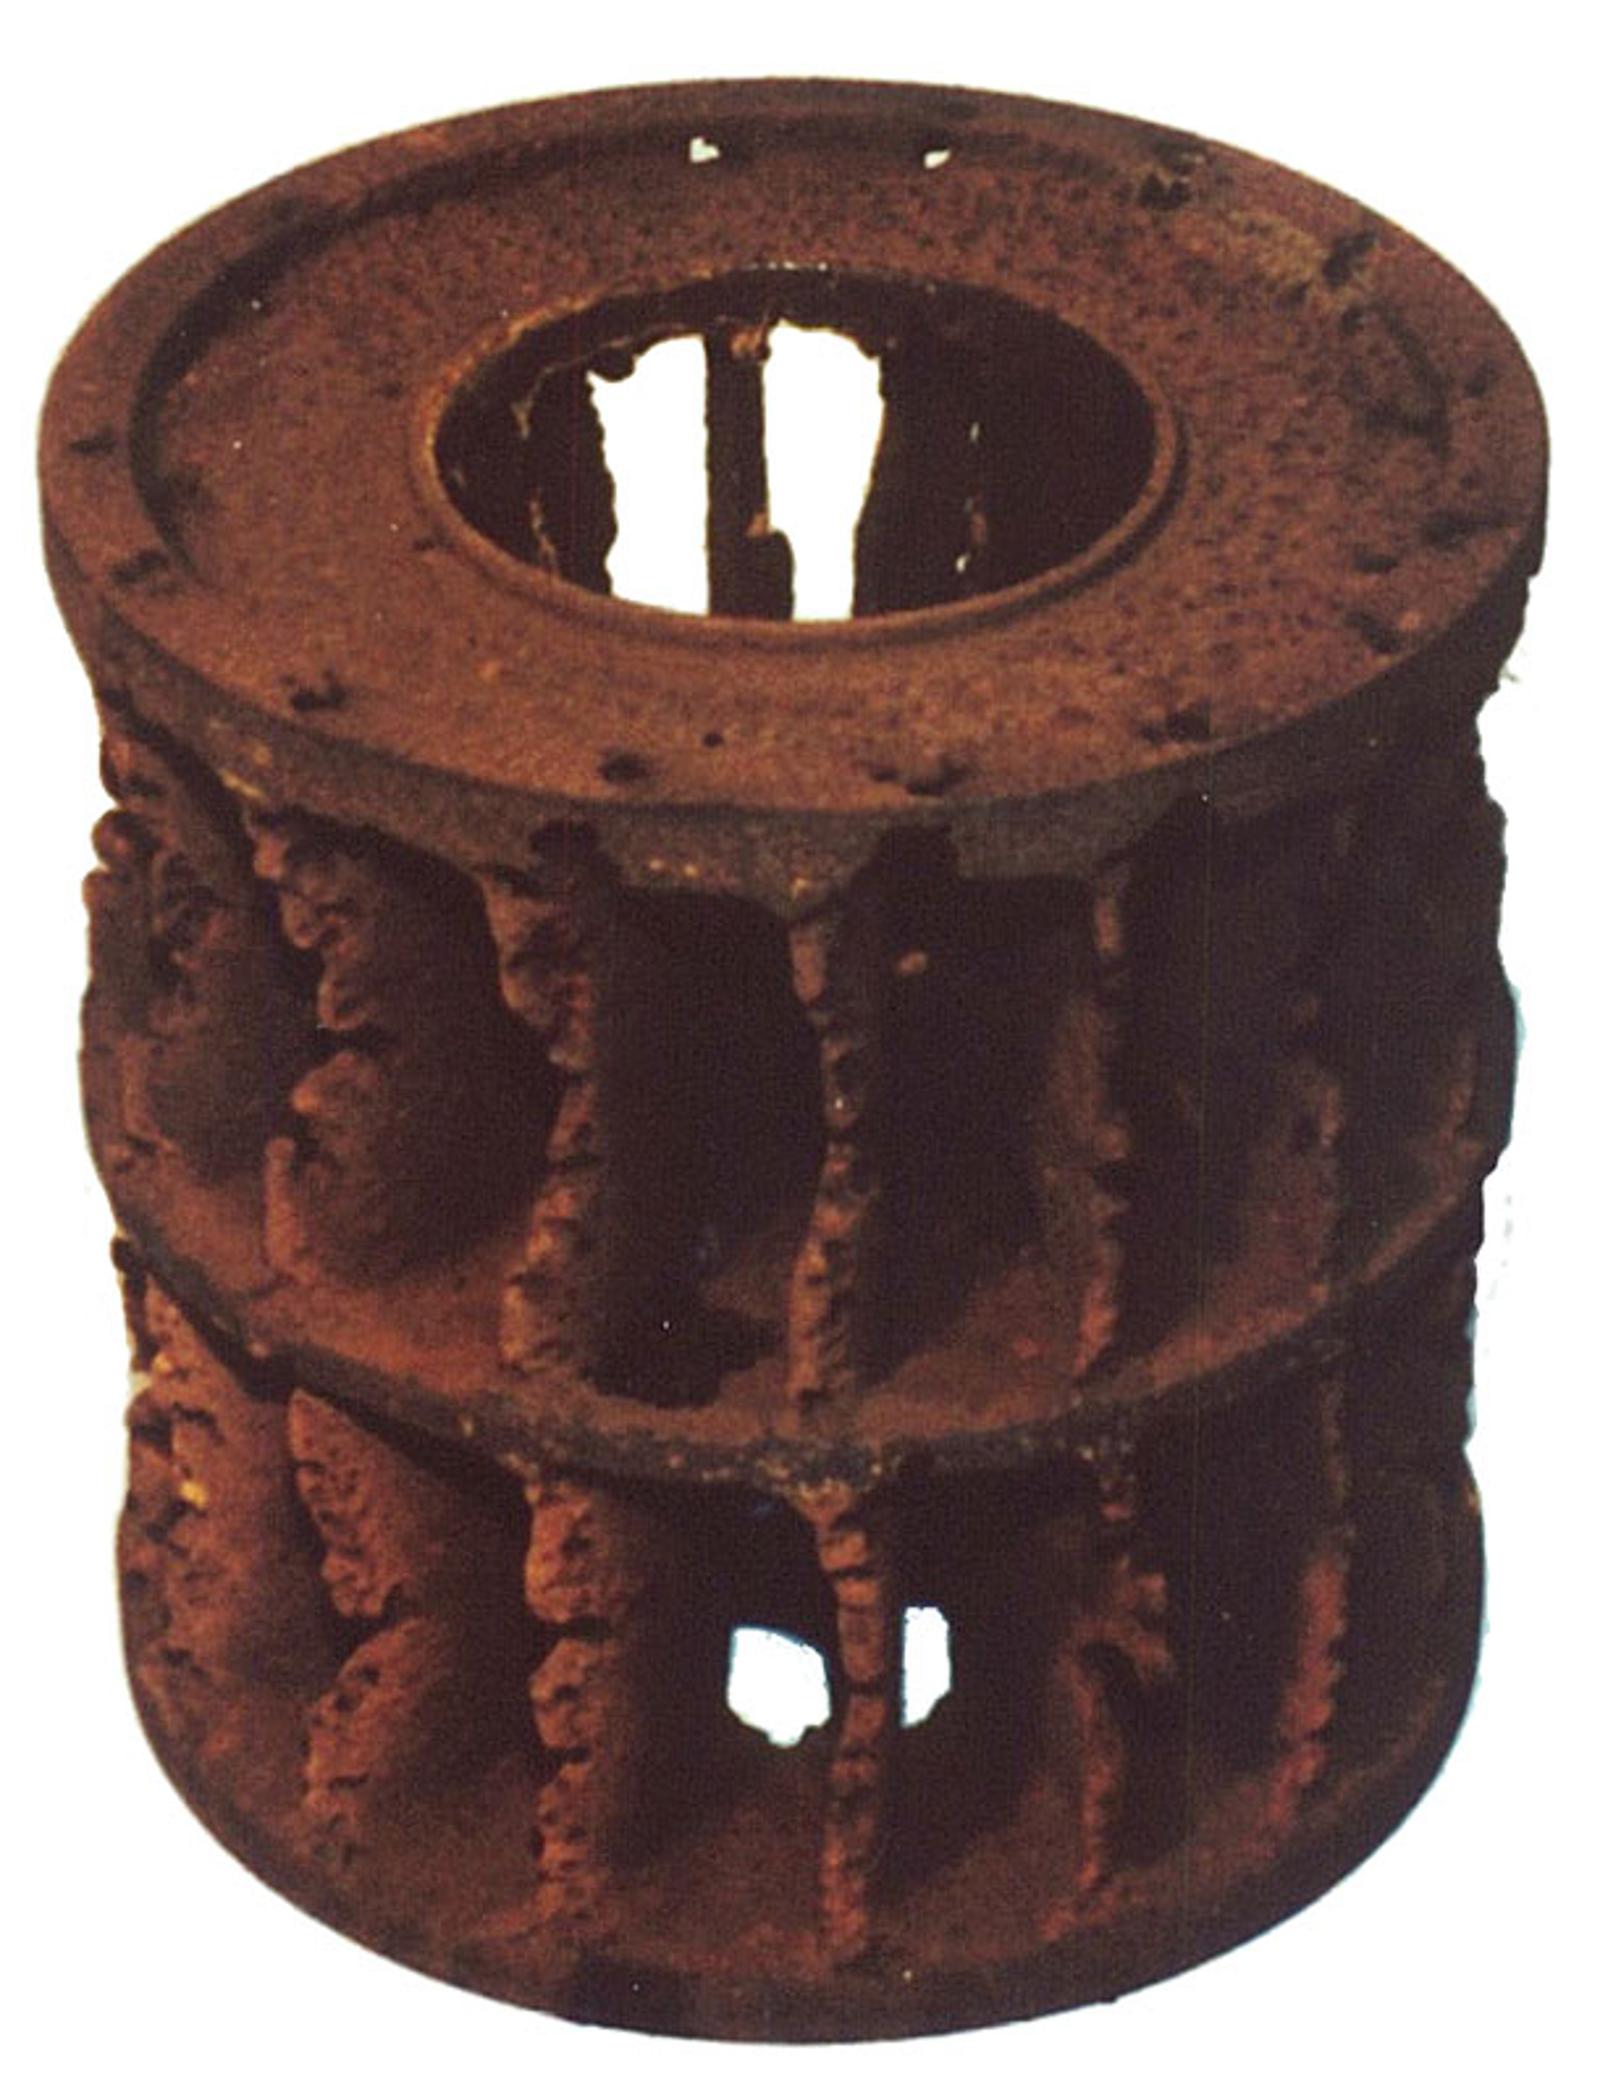
- Rough, pitted, or crater-like damage on the impeller, casing, or liquid-ring passages
- Seal liquid that appears cloudy or contains visible bubbles
- Repeated loss of prime or difficulty maintaining the required vacuum
These symptoms can have other causes, so inspect the seal liquid, discharge path, clearances, and operating pressure before confirming cavitation. The following conditions are common causes of this pump failure.
Possible Causes
Seal Water/Liquid Compressant
- Incorrect seal water (liquid compressant) rates
- Operation of liquid compressant above its vapor pressure
- Liquid compressant saturated with minute gas bubbles under pressure
Blocked Discharges
- Discharge port, pump outlet or drain blocked
Improper Clearances
- Clearance wide on pumps operating at high vacuum levels
Improper Working Pressure
- Working beyond maximum operating pressure (vacuum or compressor)
Possible Solutions
Seal Water/Liquid Compressant
- Ensure proper seal water/compressant rate
- Adjust the seal-water temperature to the recommended operating range. Hotter liquid has a higher vapor pressure, which can reduce the attainable vacuum and increase the risk of cavitation in the vacuum pump. Cooling the seal liquid, when practical, lowers vapor pressure and helps maintain stable vacuum performance. Avoid operating below the manufacturer’s recommended temperature, because excessively cold liquid can also affect viscosity, clearances, and operating efficiency.
- Change liquid compressant
- Remove bubbles from liquid compressant
Blocked Discharges
- Unblock all ports, outlets and drains
Improper Clearances
- Ensure proper clearance is maintained
Improper Working Pressure
- Lower operating pressure
Preventive Maintenance and Monitoring
Regular checks can help prevent cavitation and identify changing conditions before the vacuum pump requires major repair. Add the following items to the pump maintenance schedule:
- Check seal-liquid flow, level, clarity, and temperature. Confirm that the liquid is free of excess gas bubbles and remains within the manufacturer’s recommended operating range.
- Trend suction pressure, vacuum level, discharge pressure, motor current, vibration, and pump temperature. A gradual change in any of these readings can indicate restricted flow, excessive load, or unstable operating conditions.
- Inspect the discharge port, outlet, drain, and connected piping for blockage or buildup. A restricted discharge can increase pressure and contribute to cavitation.
- Verify impeller and casing clearances during planned inspections, especially when the pump operates at high vacuum levels or shows reduced capacity.
- Confirm that the pump operates within its rated vacuum, pressure, speed, and temperature limits. Investigate unusual noise, fluctuating vacuum, or rising power consumption before continuing operation.
- Record inspection results and compare them with previous readings. Early action can often correct a seal-liquid or operating problem before internal damage requires extensive repair.
If readings continue to worsen after these checks, stop the pump when safe to do so and arrange a detailed inspection by a qualified service technician.
A Nash Field Service Technician can perform a cavitation failure analysis by reviewing the pump’s operating data and inspecting the equipment.

Frequently Asked Questions (FAQs)
Cavitation occurs when the pressure of the seal liquid drops below its vapor pressure, causing vapor bubbles to form and then collapse rapidly. These implosions generate shock waves that can damage pump components, including the impeller and casing.
Reach Out to Our Experts